How to start a campaign
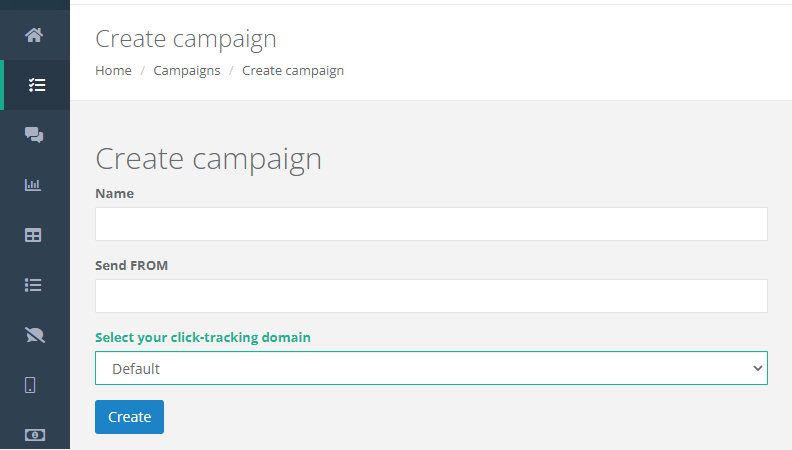
Click the Create New Campaign button, a new page with a form appears. Fill up the form with the campaign name

SMS.Studio
Created: 10/18/2021 4:08 AM - Updated: 10/23/2021 3:46 AM
Prerequisites
i) An Active Account
After logging in with a valid account. From the left menu, select campaign. You've landed on the campaign page and are ready to launch your campaign in just four simple steps.
Step 1: Create a campaign with a distinct name and sender.
When you click the Create New Campaign button, a new page with a form appears. Fill up the form with the campaign name (in my instance, "Q4-2021 Marketing") and the sender name (in the send from the field). Then, Choose a click tracking domain if a dedicated domain is assigned to you otherwise the system will randomly use the available domain for short links. In order to get a dedicated domain for click tracking contact us at support.sms.studio. When you click the create button, your campaign will be created and you will be redirected to the list page, where one or multiple lists of contacts can be assigned to the campaign.
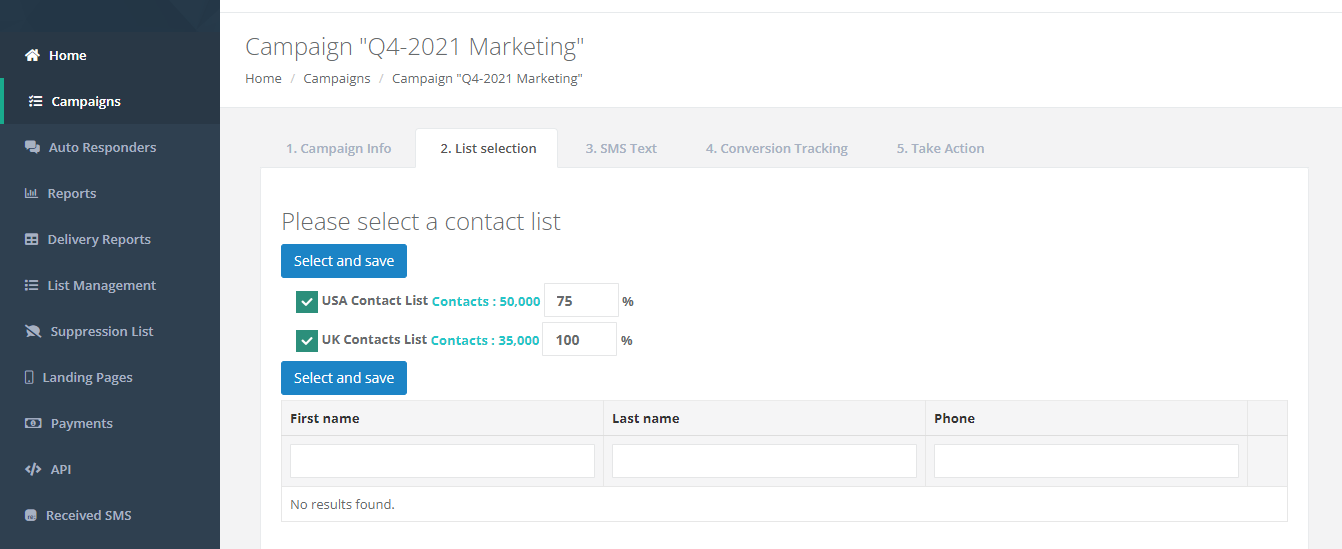
Step 2: Assign a contacts list to a campaign
Select and save a contact from the list/s you've already established. If you don't already have a contact list, read this page to learn how to upload contacts and create a list. In my scenario, I had previously created a USA and UK contact list that was ready to be allocated to the campaign. I chose 75% of the contacts from the USA contact list and 100% from the UK list. As you add contacts to the campaign and save them, you'll be taken to the SMS text tab.
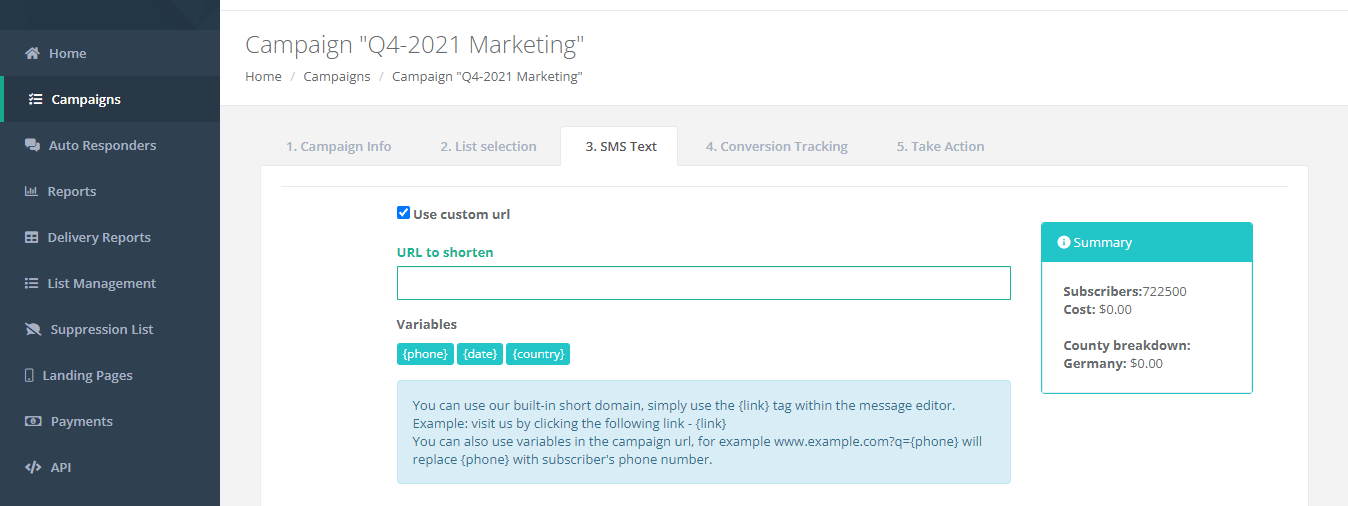
Step 3: Write a text message with several versions.
On the SMS text tab, the top right corner displays a summary box that explains the total number of subscribers selected from previous lists to whom SMS text messages will be delivered. You may now include your product/service/website URL to be shortened in the message body, along with an opt-out link. If you don't want to utilize several message variants, click the save and next option. Next step would be to launch or schedule the campaign.
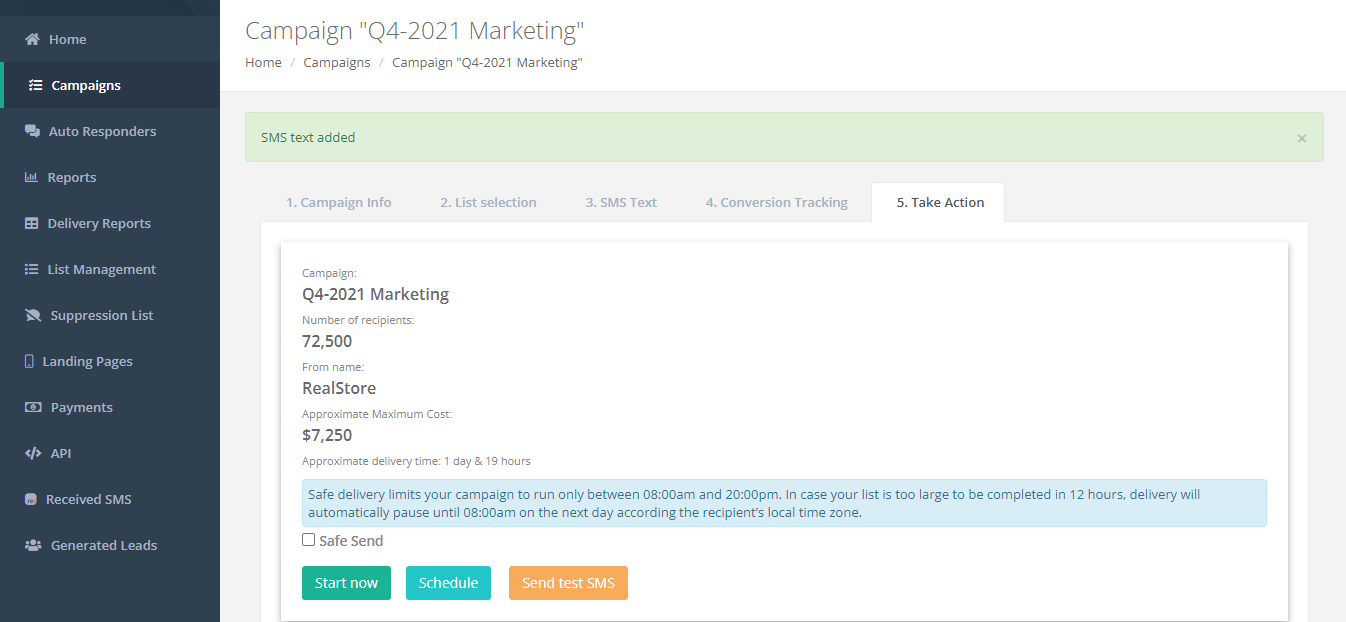
Step 4: Launch/Schedule the Campaign