How to Create a Personalized SMS Campaign with Custom Fields
How to send campaigns using customized data
Creating a personalized SMS campaign is easier than you think! By using custom fields, you can tailor your messages to resonate with your audience, ensuring each recipient feels valued. Here’s a simple guide to help you get started:
Prepare Your Data
Start by organizing your data in a CSV file. Ensure the file contains all the fields you’ll need for personalization, such as names, phone numbers, and any other relevant details.
Your CSV should look something like this:

Import and Map Your Data
Once your CSV file is ready, upload it to the system. During the import process, you’ll need to map the fields in your file to the system’s predefined fields. This step ensures that each piece of information is correctly aligned for the campaign.
Here’s what the mapping process looks like:

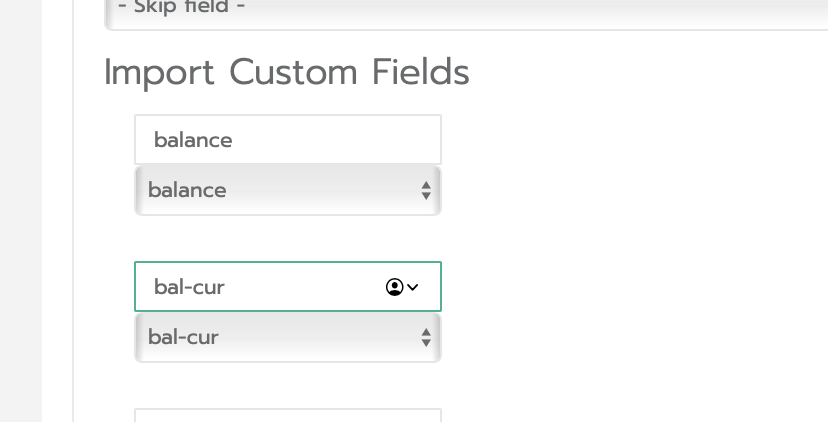
Here's how you map customized fields.
The field above is how YOU want to name the tag and the field below, is the one from your .CSV file:

Create and Send Your Campaign
With your data imported and mapped, it’s time to craft your message. Use placeholders for your custom fields to dynamically insert personalized content into your SMS.
For example:
Hi {first_name}, your balance is {balance} {cur}. (OR {bal-cur})
Click here {link}
out out {unsubscribe_link}
View the Final Result
After sending, your recipients will receive personalized SMS messages tailored to the data you provided. Here’s what it looks like in action:
"Hi Laura, your balance is $123.
Click here: www.sms.studio
opt out: www.sms.studio/oo"
